Sunday, September 8, 2013

no bake protein bars


I've started school! It's so good to be working toward something big! Even though its four to six long years until I get my degree (I'm studying nutrition) I'm loving the change and purpose I now have in my life. It's been the perfect amount of time out of school, well, maybe a little too long (8 years!), but I am so excited to be back and studying! I am definitely that older girl in class who has all her homework done early and takes way too many notes. I'm probably the only one in most of my classes who is actually interested in the material. Its awesome.

Anyway, I'm sure you are looking at this post to find a recipe, not to hear what a big nerd I am, so... here it is:

  • 10 dates, soaked for about ten minutes to soften
  • 1/2 cup maple syrup
  • 1/2 cup peanut butter (I use the freshly ground 100% peanuts kind)
  • 1 scoop protein powder ( I use Garden of Life original RAW protein powder)
  • pinch of salt
  • 3 cups rolled oats
  • 1/2 cup raw almonds, roughly chopped
  • 1/2 cup raisins
  • 1/4 cup chia seeds
  • 1/4 cup hemp seeds
Blend the dates (drained), maple syrup, peanut butter, protein powder, and salt in a food processor or blender. Scrape into a large mixing bowl. Next, blend two cups of the rolled oats, just a little, so they are still quite coarse. Mix in the blended oats, the gooey date mixture, and the rest of the oats. Add the almonds (you could really use any nut you want), raisins, hemp seeds, and chia seeds.


Line a glass baking dish with plastic wrap. This is so you can remove it easily from the pan. Press the mixture into the pan, getting out as many air bubbles as possible, and making it as flat and even as possible. Let set in the freezer for about 20 min.


Once its firmed up, flip it out onto a cutting board, use the edges of the plastic wrap to help loosen it. Then cut into desired sized bars! These are super hearty and dense so I cut mine into pretty small squares.


Perfect for an in-between-class snack!

Tuesday, September 3, 2013

stuffed portobello mushrooms


The never ending battle of wanting cheese, and not wanting cheese. I'm definitely fighting it today. Thinking about cheesy stuffed mushrooms is making me drool right now! But I don't want the dairy, and all the antibiotics and hormones that usually come with it. So, I am going to make some vegan cheesy stuffed portobello mushrooms that will make you drool. There isn't anything like the real thing, I'll agree with that, but sometimes, you might actually find something better!

This vegan cheese sauce was inspired by a few recipes I browsed through, and my vegan friend George, who is a genius in the kitchen.

It's best to make the cheese sauce ahead of time to let it set in the fridge. It can be kind of runny at first, but the cashews will expand if you give them a chance!

For the vegan cheese sauce
  • 2 cloves garlic
  • 1/4 tsp salt
  • 1 Tbsp olive oil
  • 2 Tbsp hemp seeds (optional)
  • 1/2 cup cashews
  • 1/2 cup water
  • 1 Tbsp lemon juice
  • 1/2 cup nutritional yeast
so, it looks kind of greenish in this pic, but really its yellow. 
 Put all ingredients except for the lemon juice and nutritional yeast in a blender. Blend until smooth, then add the last two ingredients. Transfer to a bowl and place in fridge to set, it doesn't take long, about 10 minutes will do!

Now for the greens
  • 2 cups finely chopped fresh spinach
  • 1 small head broccoli, finely chopped
  • 1 cup shredded zucchini

To prepare the mushrooms, rinse the tops and gently scoop out most of the gills. This will make more room to stuff the stuffing, and the more stuffing, the better. This recipe was perfect for 3 large portobello mushrooms. Set aside.


Is your vegan cheese sauce ready? It should be about yogurt consistency by now, or even a little thicker. Combine all of the cheese sauce with your veggies...


Now stuff 'em! I cooked mine on my gas grill because I don't have an oven, but an oven would work wonderfully. Just place on baking sheet and bake 400 degrees for about 30 min, or until mushrooms are cooked and filling is bubbling. If you are trying the grill method, they only take about ten minutes, but they don't get that nice crispiness on top. They still turned out fantastic! I served mine with quinoa.

these photos were taken before they were cooked, but they don't change too much.

Notes: If your cheese sauce seems too thick, or you just want it thinner, just add some more water. I went on the conservative side with the water for the recipe because you can't take it out!

If you are baking them in the oven, top with whole wheat bread crumbs for a crispy golden finish! Yum!

Sunday, September 1, 2013

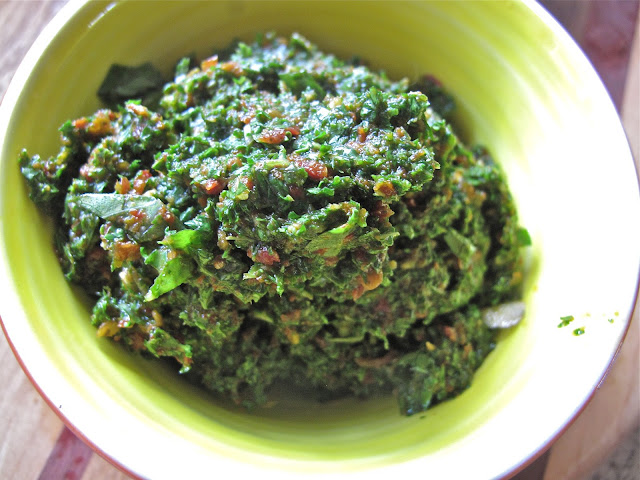
kale pesto + sun dried tomatoes

This is by far the easiest and healthiest pesto I've ever made. I love pesto; on toast, with crackers, tossed with pasta, its just so easy and bursting with flavor. Adding kale to the equation just made it way healthier, and go a lot further!


  • 2 cloves garlic
  • 1/2 cup fresh basil
  • 1/4 cup sun dried tomatoes (in oil)
  • 1/4 cup olive oil
  • 3 large kale leaves, de-stemed 
  • black pepper (optional)


Just throw everything in a food processor and blend away! There is no need for nuts or cheese in this pesto, the sun dried tomatoes add tons of flavor and saltiness. You can't even really taste the kale! Its too easy, and its amazing on pasta! I tossed some brown rice penne pasta with the kale pesto and topped it off with some sauteed zucchini last night for dinner, yum.