Sunday, December 13, 2015

pumpkin spiced muffins


Next week is finals week! Ahhh! I have all of my tests on Monday, which is a good and a bad thing. A good thing because I get them all done in one day, the first day of finals week, but a bad thing because I have three big tests all back to back! So, I have been studying my brain out. Fortunately I found time to take a baking break :)

These vegan pumpkin spice muffins are really more like cupcakes: sweet, soft, moist, and spongy. A treat well deserved when hours upon grueling hours are being spent over the books. I ate two immediately. And I don't feel bad about it. I also ran six and a half miles this morning, so I was in need of a sweet treat to fuel my body and my brain.

This recipe is only slightly adapted from Apple of My Eye. I just substituted some of the sugar for maple syrup and cut down on the oil. They turned out amazing, the perfect pairing with a nog coffee (coffee with soy nog- one of the best things about this time of year- nog season).


pumpkin spiced muffins
  • 1 3/4 cups whole wheat flour
  • 1 Tbsp baking powder
  • 2 tsp pumpkin pie spice
  • 1 Tbsp cinnamon 
  • 1 cup pumpkin puree
  • 1/2 cup raw sugar
  • 1/2 cup maple syrup
  • 1/2 cup plain almond milk
  • 2 Tbsp coconut oil


Preheat the oven to 375 degrees F. Combine flour and baking powder in a large mixing bowl. In another bowl whisk together all wet ingredients, spices, and sugar. Add wet ingredients to dry ingredients and mix until fully combined. Line a muffin tin with paper liners or lightly with coconut oil. Fill wells to 3/4 full. Sprinkle with desired toppings -- pumpkin seeds, coconut, pecans, walnuts, etc.


Bake for 15-18 minutes, poke with a toothpick or knife to check. If it comes out clean they are done! Allow to cool for 5-10 minutes and enjoy!


Monday, November 9, 2015

five ingredient peanut butter cookies


I had a crazy craving for peanut butter cookies the other day! It was so weird because I haven't had a peanut butter cookie in years. Actually, that's probably why, once I got them into my head, I couldn't get them out. So, naturally, the first thing I did when I got home was make peanut butter cookies. I don't bake that often so I didn't have much for baking supplies. It ended up working out miraculously with the ingredients that I had on hand and that crazy craving was satisfied. These are so simple and quick that I have already made them again! The second time was to accompany some blackberry chia seed jam, a pb&j dream.

five ingredient peanut butter cookies
  1.  1 cup oats (or oat flour)
  2.  1 tsp baking soda
  3.  1/4 tsp salt
  4.  1 cup peanut butter
  5.  1/4 cup maple syrup
Grind oats in a food processor or blender into a flour. This was my solution for not having any flour, but if you have oat flour, or any other flour you want to try, do it! Let me know how it works! I love using oats and oat flour because they have such a mild flavor. Add the baking soda to the flour and set aside. In a separate bowl combine the salt, peanut butter, and maple syrup. Whisk together until completely combined. Add the dry ingredients to the wet a little at a time. By the last bit the dough will be very crumbly but I just used my hands, I love using my hands.


Roll dough into 1" balls and place on a lightly greased cookie sheet. Flatten balls with a fork, criss-cross style. They won't expand so don't worry about the cookies being too close together.


Bake at 350 degrees F for about 8 minutes. Let cookies cool completely before transferring from baking sheet. Trust me on this one or you'll have cookie carnage.


These cookies are crumbly and melt in your mouth, just as a peanut butter cookie should be.


As for this brilliant pb&j combo going on here, you can find a recipe for strawberry chia seed jam here, but use whatever berries you want! 

Monday, October 26, 2015

roasted red pepper + white bean pasta


Hummus as a pasta sauce? Why not? I eat hummus on everything from apples and carrots, to sandwiches and quesadillas! Beans are definitely a staple in my diet. Lentils, black beans, garbanzo beans, white beans; they all have a place in my heart (more like my stomach).

This Mediterranean inspired pasta dish came into existence sort of by accident. I had roasted some red peppers, not knowing what they would become. The next day they became a roasted red pepper + white bean hummus. And then I stumbled upon a hummus + pasta dish by Half Baked Harvest via Pinterest. So a hummus + pasta was born.

roasted red pepper + white bean pasta
  • 2 whole roasted red peppers
  • 2 cloves garlic 
  • 1 can white beans (cannelini or great northern)
  • 1/2 tsp salt
  • 2 Tbsp olive oil
  • 1/4 cup water
  • pasta of choice- I usually do 1/2 whole wheat spaghetti 1/2 zucchini noodles
  • 2 fresh roma tomatoes
  • handful of fresh basil
To roast the red peppers cut in half length wise and place on a foil lined baking sheet. Back at 350 degrees F for about 40 minutes. Roasted red peppers from a jar or can will work too, but there is nothing like the real thing! 
Remove the stem and most of the seeds from the peppers when they have cooled enough to handle. Add to a food processor along with rinsed and drained white beans, garlic, salt, olive oil, and water. 
*If you are making this for a dip rather than a pasta sauce, hold back on the water and just add enough to get desired consistency. 

Blend until smooth.


 Well, that was easy. Past sauce done. Cook pasta as directed and spiralize or julienne zucchinis if using. 


I like to do about half zucchini noodles and half whole wheat spaghetti. The portion sizes here are up to you, there should be enough sauce to cover enough pasta for four people. Or just make enough for two and keep the extra sauce as a hummus/dip/spread for tomorrow.

Dice the roma tomatoes and fresh basil. After draining the pasta, toss it with the zucchini noodles and return to the pot over low heat. Toss the sauce, tomatoes, and basil in with the pasta over the heat until warm. 

Served here on a Wings Hawaii decal dish!


Thursday, October 15, 2015

blueberry birdseed bars + finding my balance

I can't believe that I have been blogging for two and a half years! I am so thankful to everyone out there who is reading my posts and making my recipes, you are my motivation. I strive to inspire a healthy diet and lifestyle. With that being said, I think it's about time that I share a little more about myself.

Hi!

I am not vegan. Hence the name. I believe a vegan lifestyle is good for the animals, the planet, and my body, but I also believe in finding a balance and rhythm that works for me, with all labels and titles aside. The thing is... food stresses me out! By putting restrictions on myself and my diet I give myself anxiety. I don't need anymore stress in my life, earning a bachelor's in science is stressful enough right now. I go to school or work 6 days a week and spend the rest of my time doing homework!

I have been having a really hard time lately managing my stress and my time. I finally broke down last weekend and realized, with help from my wise mother, that I am putting way too much pressure on myself. Pressure to be a perfect student, to eat the perfect diet, to live the perfect life here in Hawaii. What a slap in the face that was! And a profound realization that am not perfect, I never will be, and perfect is a unicorn - it may not even exist. As Mom said, "You don't have to get straight A's but you do have to be healthy and happy." Amen. It's time to lighten up. Thanks Mom.

There is a new term coming onto the nutrition scene called the "flexitarian". This in itself sounds like an oxymoron to me. A status given to those who drift between statuses. Why do we feel the need to label everything?! Either way, this is probably the diet category that I would fall into. I eat mostly a whole foods plant based diet with a little bit of sushi here and there, a drizzle of honey now and again, and I never go too long without having a beer (or two). My diet doesn't consist of "rules" and "restrictions" but instead of choices that I consciously make. My goal is to find my balance. A balance that honors my body, my mind, my relationships, my busy schedule, and my overall happiness. Too much to ask? Apparently, as it has been a huge challenge for me. A challenge that I face every morning when I wake up. But a challenge that I love and live for.

Alright, alright, lets make some good food! I have so many recipes that I want to share but not enough time to put them into posts. Organic chemistry takes up most of my time these days and I am currently writing a ten page paper! But bare with me, I'll get it together eventually! Balance, right?


Homemade granola bars and some sort of energy ball are always in my fridge. They are so easy to pack and great for a quick snack or even desert. For more ideas check out my sweets and treats page!

birdseed bars

  • 2 cups rolled oats
  • 1 cup almonds
  • 1 cup pumpkin seeds
  • 1 cup sunflower seeds
  • 1 1/2 cups dates (soaked for a few minutes in hot water)
  • 1/3 cup maple syrup
  • pinch of salt
  • 1/2 cup sesame seeds
  • 2 Tbsp flax seeds
  • 1/2 cup dried blueberries (or dried fruit of choice)

Place oats and almonds in a food processor and grind into a course meal, add the pumpkin seeds and sunflower seeds and pulse until roughly chopped. Transfer to a bowl.


Drain dates and add them to the food processor with maple syrup and a pinch of salt. Blend into a smooth paste. Add this, the sesame seeds, flax seeds, and dried blueberries to ground oat mixture.


Fold together with a wooden spoon or with your hands. Line a small baking tray with parchment paper, plastic wrap, or tin foil. Transfer mixture onto tray and press firmly down until flat and even (or at least as flat and even as you can get it, press hard!).


Place tray in freezer for about 20 minutes. Use whatever you lined the tray with to help you transfer the whole thing onto a cutting board. I found there is a sweet spot here, you don't want it to be completely frozen because then it is really hard to cut (especially the blueberries) but you want it to be frozen enough that you can transfer it without breaking it. So, if it doesn't feel firm enough, just freeze it for a little longer, or if it is super frozen because you forgot about it (done it!) just leave it out for a few before cutting it.


Slice into bars or squares and store in the fridge!


Wednesday, September 16, 2015

real veggie burgers + tahini bbq sauce


School is in session! Yikes! The chaos of Oahu life has officially set in, complete with organic chemistry, biology, and sociology.

Amidst the busy schedule, tons of homework, and hardly any time with my wonderful husband, I feel a massive weight lifted off of my shoulders. We did it. We moved to Oahu from Maui; found a place to live, new jobs, and have successfully settled in on a new island. I feel as though I can wipe my hands clean of the daunting move (phew!) and focus on the tasks at hand.

Although school takes up most of my time, I am also working two days a week at an awesome little sandwich shop in Kaimuki called Sprout. Some inspiration for this post came from Sprout's signature vegan patty; the Sproutwich. Black beans, oats, sunflower seeds, carrots, and... oops! I can't tell you anymore, sorry, you'll just have to trust me that it is totally packed with flavor, super filling, and Tom and I are seriously addicted. The iconic Sproutwich is served with bbq sauce, a tahini based cilantro lime aioli, sprouts, butter lettuce, and tomatoes. You have to try one if you are ever in Kaimuki! I am also selling my vegan energy balls at Sprout so make sure you try one of those too ;)

Veggie burgers (not just the Sproutwich) are a staple in our house because they can be batched up and frozen. They are perfect for a quick dinner or something to bring to a bbq. I feel that it is essential that I make my own veggie burgers because store bought ones usually have all sorts of processed soy products, preservatives, and things that I can't pronounce and don't dare look up. I like to eat real food, and I like my veggie burgers to have real veggies in them. I have two other veggie burger recipes in the blog archives that I rotate between so check them out too! broccoli + millet burgers and black bean + beet burgers.

 real veggie burgers
  • 1 1/2 cup oats
  • 1/2 cup sunflower seeds
  • 1 cup broccoli florets
  • 3 spring onions
  • 3 cloves garlic
  • 2 carrots
  • 2 flax eggs (2 Tbsp flaxmeal + 1 cup water)
  • 1 can garbanzo beans
  • 1 tsp italian seasoning
  • 1 Tbsp Bragg's amino acids

Prepare the flax eggs by whisking together 2 Tbsp flax meal with 1 cup of water, set aside. This recipe involves three steps in the food processor, meaning different ingredients are processed at different times to ensure that everything ends up with the desired consistency. Don't bother washing, or even rinsing, the processor in between, it's all going to the same place! Grind the oats and sunflower seeds in a food processor into a fine meal.


Transfer them into a bowl. Now add all the veggies (roughly chopped) to the food processor. 


Process veggies until no large chunks remain, the more you process them, the less detectable they'll be in your burgers, so this part is up to you! Add veggies to the oat and sunflower meal. Now add the garbanzo beans to the food processor and blend. I usually blend to about the same consistency of the veggies. Add blended garbanzos to the bowl along with the flax eggs, italian seasoning, and the Bragg's amino acids. 

Mix all ingredients together, I like to get down and dirty and just use my hands, it seems much more affective. You should have a doughy ball that looks something like this: 


Form into patties and place on a cookie sheet. 


If I am freezing the veggie burgers I will freeze them on a cookie sheet first, then transfer them to a big container so they don't freeze together and I can get a few out at a time. If I am baking them right away, I pop them in the oven at 350 degrees F for about 15 minutes on each side. If they are frozen, bake 20 minutes on the first side and 15 on the other side. 

Each batch makes about 8 burgers but the recipe is easily doubled. I usually double it to keep extras on hand for a night when I have too much homework to think about dinner! These real veggie burgers are great on whole wheat buns, multi grain ciabatta, or even just on top of a green salad. 

I haven't had bbq sauce in years so I took it upon myself to make a healthier version of a bbq flavored sauce. I discovered two things that are essential to achieving this flavor: smoked paprika and enough sweetener. Of course, the first batch I made with regular paprika and trying to skimp on the sweet. Not worth it my friends. The sweet smokiness is what makes it bbq-- so do it right!


tahini bbq sauce
  • 3 Tbsp tahini
  • 3 Tbsp tomato paste
  • 1 Tbsp balsamic
  • 2 Tbsp maple syrup
  • 2 dates
  • 1/2 tsp salt
  • 1 tsp smoked paprika
  • 1 cup water

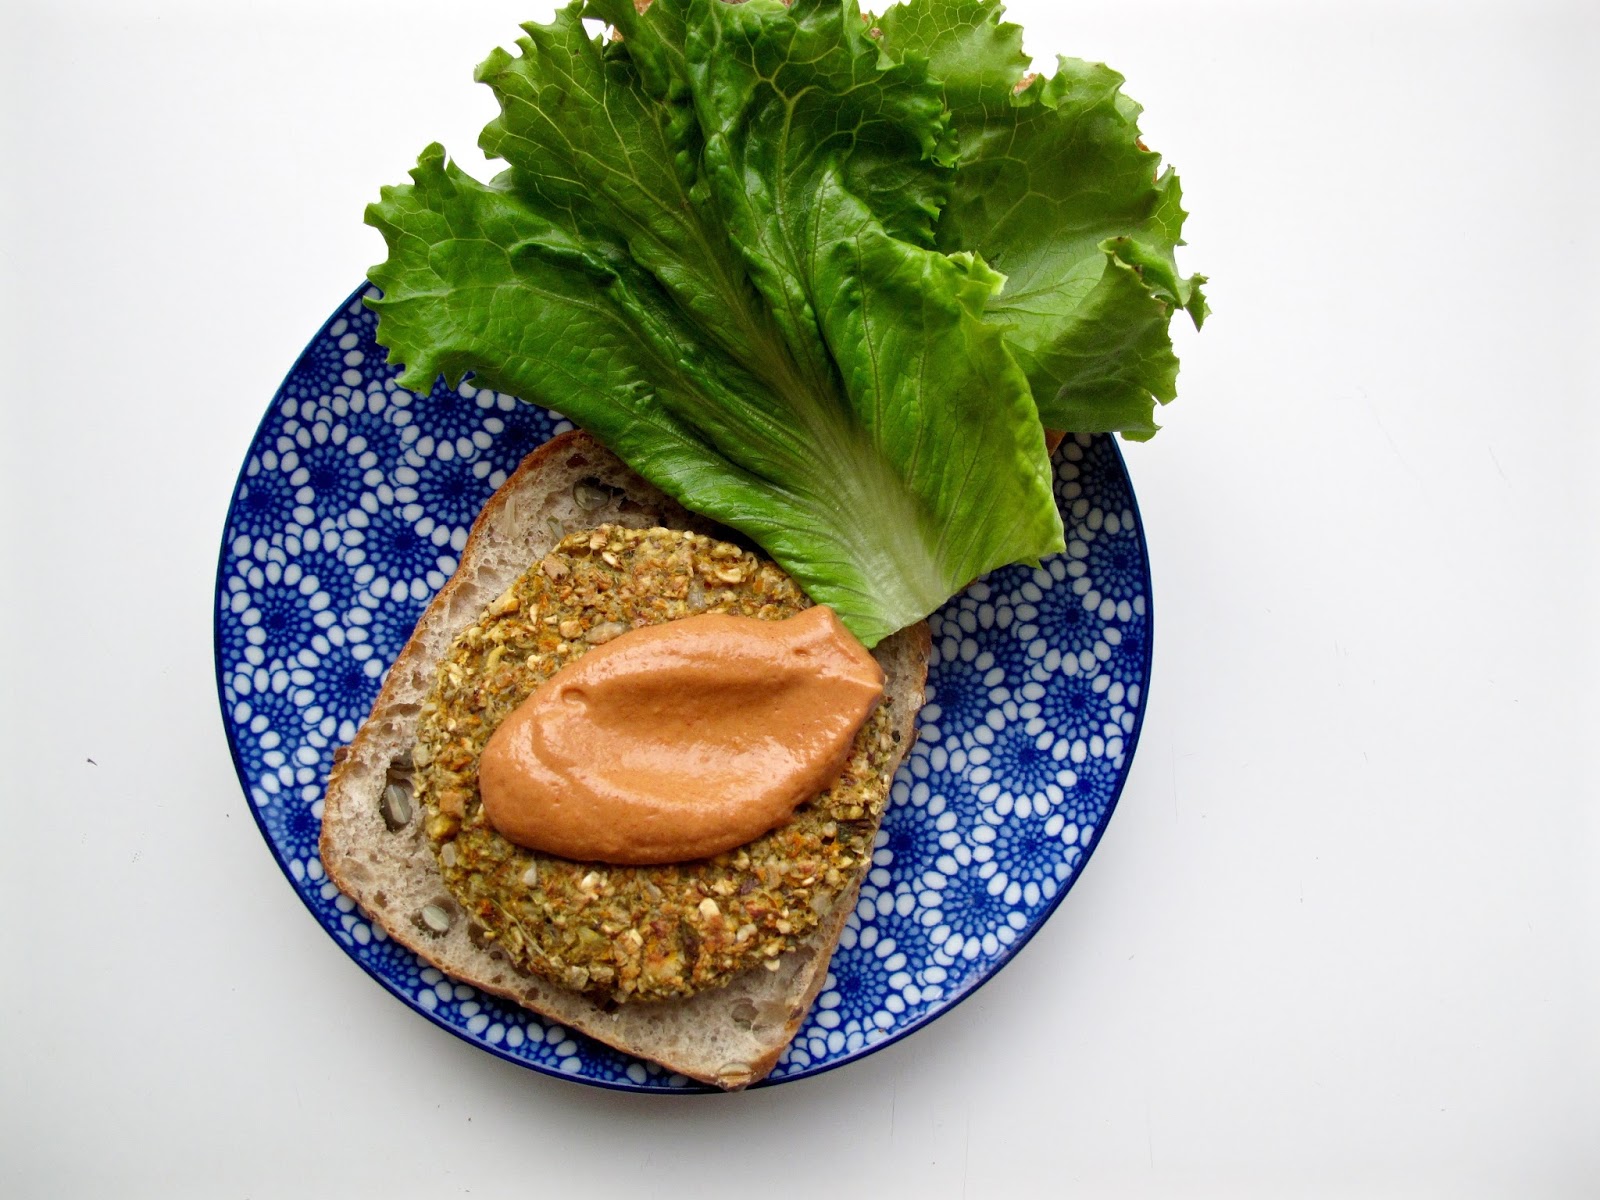
Combine all ingredients in a high speed blender and blend until smooth. This sauce is thick, creamy, sweet, and smoky. It makes for a great burger condiment, sandwich spread, or dip for oven baked potato wedges. Mmmmmm...


Now smother that real veggie burger with tahini bbq sauce and smile, because it feels good and tastes good, to be a vegan!


Wednesday, September 9, 2015

creamy beetroot pasta


I could honestly call this a beetroot alfredo sauce. It's so "creamy" that I could have any non-vegan fooled! Mua-ha-haha!

And how frickin gorgeous is it?! Beet is one of my favorite colors. Yes, beet is a color, and so is turmeric. :)

creamy beetroot pasta

  • 2 cloves garlic
  • 2 whole roasted beets
  • 8 oz. firm tofu
  • 1/2 tsp salt
  • 1/4 tsp black pepper
  • 1/2 tsp italian seasoning
  • 1 tsp balsamic vinegar
  • 1/2 cup water
  • penne pasta

I have been roasting a load of veggies on Sunday afternoons to have them throughout the week; beets, sweet potatoes, red potatoes, butternut squash, etc. It makes cooking dinner with a busy schedule much more bearable!

For the beets; trim the ends and wrap together in a piece of foil. Place on a cookie/baking sheet in a 400 degree F oven for about an hour. When the beets have cooled a little bit they are easy to peel with your fingers. If you are crunched for time peel the beets before you roast them so you don't have to wait for them to cool. Cut the beets into chunks.


Combine garlic, beets, tofu (also cut into chunks), salt, pepper, italian seasoning, balsamic vinegar, and water in a high speed blender and blend until silky smooth.

Boil water and cook penne pasta as directed. I used about 12 oz dry pasta with this amount of sauce and it was very saucy. I like it saucy. But you could definitely stretch it over 16 oz of pasta.


Transfer your beautiful beetroot sauce into a saucepan and heat until just hot. Drain the pasta and combine it with the sauce. Serve with a parsley garnish and feast your eyes as well as your belly because this dish is stunning!


Wednesday, September 2, 2015

earl gray smoothie


I love earl gray tea. Sweet bergamot orange and tangy black tea were simply made for each other. This creamy, caffeinated smoothie is made with just bananas, earl grey tea, and chia seeds. No where for that flavor to hide.

First, a few quick facts about tea. All teas (green, black, white, and oolong) are actually from the same plant; camellia sinensis. All contain flavanoids which act as antioxidants, fighting off free radicals that form in our bodies. Free radicals have been linked to causing cancer so drink your teas!

I like to double up on the tea bags when I am adding teas to a recipe. This concentrates the flavor, making it shine through and compliment the other flavors without watering down the whole thing. Steep the tea bags for about 4 minutes. Don't forget or it will get bitter! Place the brewed tea in the fridge overnight. It's important that the liquid in your smoothie is cold to get an "ice cream like" consistency.

  • 2 frozen bananas 
  • 2 Tbsp chia seeds
  • 1 1/2 cups cold earl grey tea
Add all ingredients to a high speed blender and blend until creamy and smooth. Serve with granola topping. I had just made honey + nut buckwheat clusters yesterday so I tried them out with this smoothie! Fantastic.


If you are interested in the honey + nut buckwheat clusters, just check out my chunky chocolate buckwheat granola recipe but use peanut butter instead of tahini, and honey instead of maple syrup.  Or just make the chocolate version because that is amazing too! 
 

Wednesday, August 26, 2015

spirulina popcorn


I recently had something really cool happen to me. Someone I don't know reached out to me after reading my recipe for quinoa + spiri balls. Garrick Dee, from the blog Juicing with G, had just written an article on the health benefits of spirulina and wanted to share the information with me. I love that. I love the connection we can make these days through social media. It's not a popularity contest (well, it is to some people) but a tool for self education. Check out the article here!


I also love realizing that other people out there across the globe have access to my recipes and blog posts. And people are reading them! Not just my mom, sister-in-law, and best friend. It's very cool.

There were two reasons for starting this blog (which has been up and running for over two years now, woo hoo!). One reason was for myself; to document and record all of my recipes so I could come back to them and keep track of them and maybe someday do something with them (cookbook?). And the second reason is for everyone else; I want to encourage, motivate, and inspire health in others. I believe that a healthy lifestyle starts in the kitchen, and that anyone can do it. I don't want to push or preach the way I live and eat but only to demonstrate how easy it can be to be healthy, and of course how delicious.

So, fall semester is about to begin. This means that 4 days a week I will be riding my bike to campus for classes and 2 days a week I'll be working. Sh#@'s about to get real. I have been thoroughly enjoying my long summer days off with no homework and extra hours to work on recipes in my breezy little kitchen. My absolute favorite past time is listening to podcasts while creating recipes. I don't even mind doing the dishes. Today I made some chili and rice collard wraps, honey + nut buckwheat granola, and popped up some spirulina popcorn while listening to No Meat Athlete interview Chef AJ. Heaven.

My mom was a popcorn addict. We had it all the time as kids. Always with butter, salt, and brewer's yeast. So, needless to say, I have been stove-top popping for a very long time. If you have an air popper, even easier.

  • 1/2 cup popcorn kernels
  • 1 1/2 Tbsp coconut oil
  • 1/4 tsp salt
  • 1 Tbsp nutritional yeast
  • 1 tsp spirulina


For the stove-top method, heat oil in heavy bottom pan (one with a lid). When the oil is hot, add the kernels and put the lid on the pot. Holding the lid down, give it a little shimmy/shake to coat the kernels in the oil. Once the corn starts popping lift the pot off the heat every few seconds for another shake. When the popping slows way down remove the pot from the heat. Transfer popcorn to a large bowl and sprinkle with salt, nutritional yeast, and spirulina. Toss the popcorn with a wooden spoon to coat evenly. If you do this while the popcorn is still warm it will stick to it better, so have your toppings reading for topping!

Snack liberally.


Wednesday, August 19, 2015

vanilla + turmeric overnight oats

Another shade of breakfast: yellow.


Ever since my husband tore his meniscus in his knee four years ago, he has been constantly looking for ways to include more anti-inflammatory foods into his diet. Turmeric fits the bill. Because it is loaded with antioxidants it is said to be great for inflammation and immunity. He is now to the point where he eats it raw; about a teaspoon of fresh turmeric grated up and mixed with a little coconut oil and black pepper. Black pepper and fatty acids are said to compliment the bio availability of turmeric; making it more accessible for our bodies to absorb. If you were really crazy here you could add black pepper and coconut oil to your overnight oats, but I'm just not that crazy yet. To learn more, check out turmeric for health.


vanilla + turmeric overnight oats
  • 2-3 inch piece of turmeric root (I used the amount in the picture below)
  • 2 cups of almond milk or milk of your choice
  • 1 tsp vanilla
  • 2 cups rolled oats
  • 1/4 cup chia seeds
 

toppings:
  • fresh fruit (bananas)
  • shredded coconut
  • cacao nibs 

Blend the pieces of turmeric root with almond milk and vanilla. I don't even peel the turmeric most of the time because the skin is very thin and delicate and will blend up into nothing (much thinner than the skin on ginger root). I realize that a lot of places don't have access to fresh turmeric root. Living in Hawaii, we are able to buy local turmeric for a very decent price at the local farmers market. If you are trying this with powdered turmeric I have a few pieces of advice. First; powdered turmeric tends to be a little more bitter, it somehow loses the natural sweetness found in the fresh root. I would recommend adding a little sweetener if you are using powdered turmeric-- a tablespoon of maple syrup should do the trick. Second; powdered turmeric is much more concentrated so you don't need nearly as much. I would start with 1/2 teaspoon and go up from there.


Once you have blended the turmeric milk pour over the oats and chia seeds in a mixing bowl. Stir to combine. Portion out into jars, this makes two larger portions or three small jelly jar portions. Lid the jars and place in the fridge overnight.


In the morning, transfer oatmeal into a bowl and serve with desired toppings.